Now that you’ve unboxed your new MacBook and are eager to embark on your React Native development journey, there’s some essential groundwork to cover before you can start building production-ready apps. While your MacBook comes pre-equipped for many tasks, mobile development requires careful configuration to ensure optimal performance and avoid frustrating roadblocks down the line.
The setup process involves more than just installing a few programs – you’ll need to:
- Establish a proper development environment
- Configure platform-specific tools
- Optimize your system for mobile workflows
- Prepare for both iOS and Android development (even if you initially focus on one platform)
Many beginners make the mistake of rushing through setup only to encounter mysterious build errors later. By taking the time to properly configure your system now, you’ll save countless hours of troubleshooting and create a stable foundation for all your future React Native projects.
In this comprehensive guide, I’ll walk you through the essential checklist of tools and software you’ll need to configure before your MacBook is fully prepared for React Native development. Let’s get started!
1. Identify Your MacBook Model: Intel vs. Apple Silicon (M1/M2)
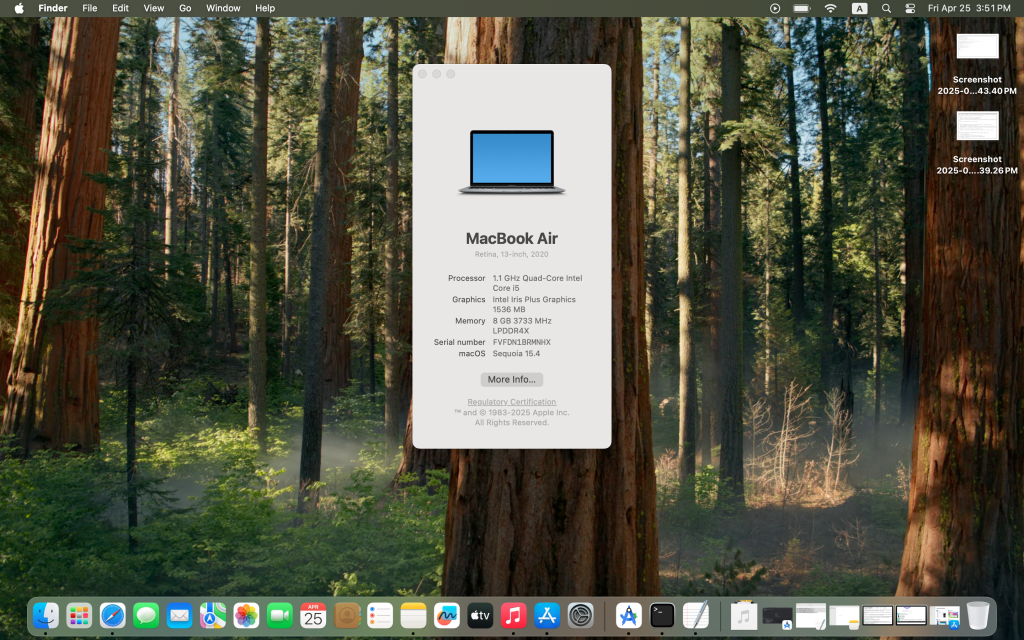
Understanding your MacBook’s specifications is crucial for selecting the correct Android Studio version and avoiding compatibility issues. As shown in my screenshot [consider inserting actual screenshot here], I’m using a 2020 13-inch MacBook Air with Retina display featuring an Intel processor.
This hardware information is critical because:
a.) Processor Architecture Matters:
- Intel-based Macs require the standard x86 version of Android Studio
- Apple Silicon (M1/M2) Macs need ARM-optimized builds
b.) Performance Implications:
- Intel Macs: Use traditional x86 Android emulators
- M1/M2 Macs: Require ARM64 system images for optimal emulator performance
c.) How to Verify Your Specs:
system_profiler SPHardwareDataType | grep -E "Chip|Processor"- Intel Macs will show processor speed (e.g., “1.1 GHz Dual-Core Intel Core i3”)
- Apple Silicon shows chip name (e.g., “Apple M1”)
2. Download Java JDK
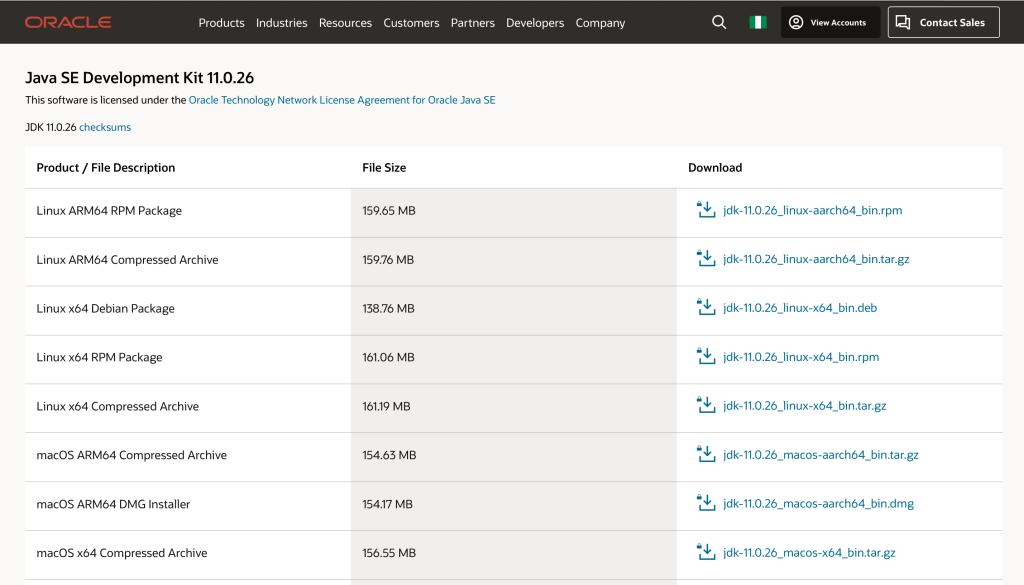
Now that you’ve identified your MacBook’s architecture, the next critical step is installing the Java Development Kit (JDK). For this guide, we’ll be using JDK 11 (LTS version) because:
a.) Compatibility Benefits:
- Fully supported by current Android Studio versions (2023.1.1+)
- Stable with React Native 0.72+ (latest LTS version)
- Better memory management than newer JDK versions for mobile development
b.) Download Process:
- Visit Oracle JDK Downloads
- You’ll need an Oracle account (free to create)
- Select the appropriate package:
- intel Macs: macOS x64 DMG Installer
- Apple Silicon: macOS ARM64 DMG Installer
c.) Installation Verification
java -versionShould return:
java version "17.0.15" 2025-04-15 LTS
Java(TM) SE Runtime Environment (build 17.0.15+9-LTS-241)
Java HotSpot(TM) 64-Bit Server VM (build 17.0.15+9-LTS-241, mixed mode, sharing)
3. Download And Install Android Studio
Now that you’ve successfully installed the JDK, the next critical step is setting up Android Studio. Follow these detailed instructions:
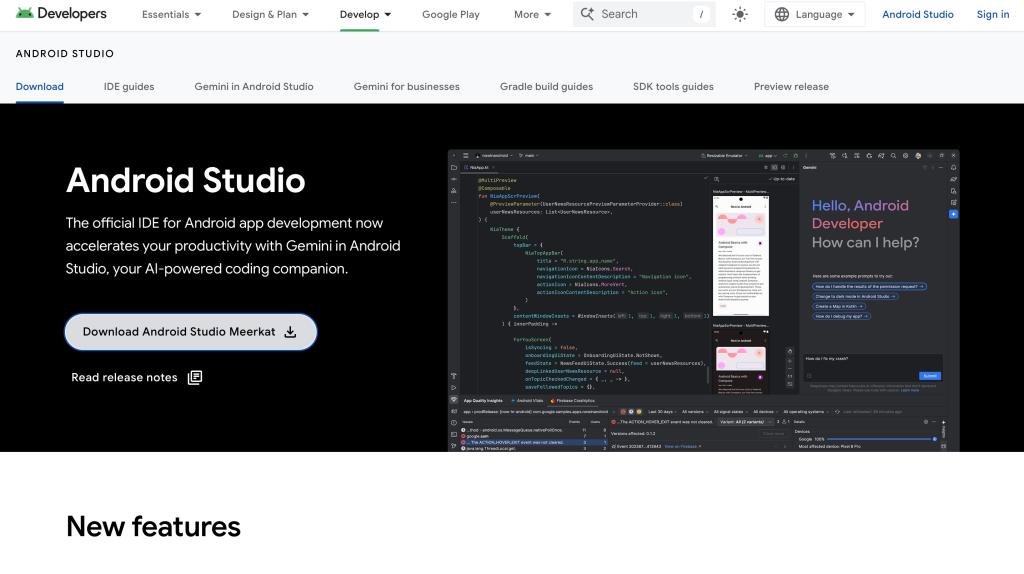
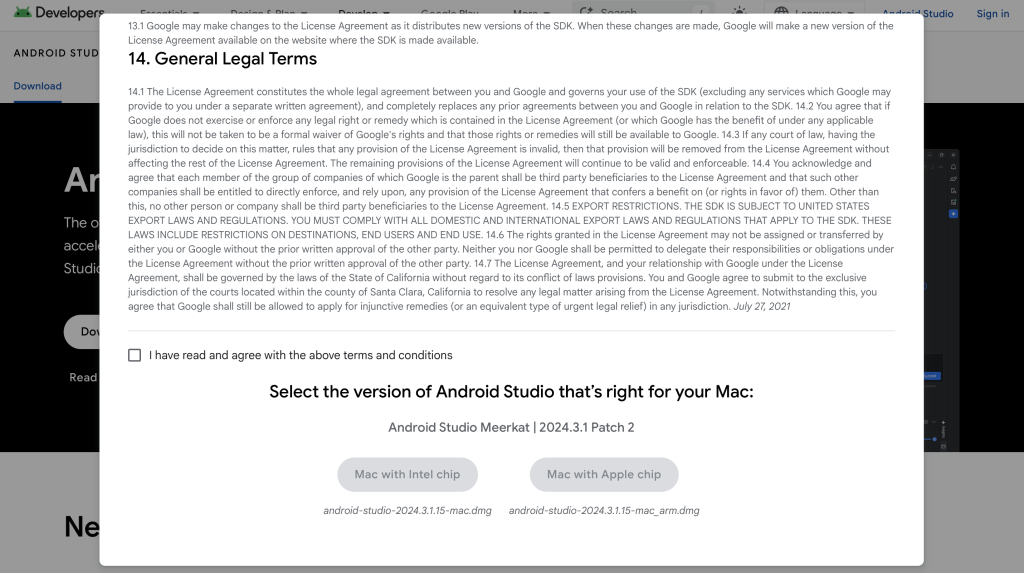
- Downloading the Correct Version:
- Visit the official Android Studio download page
- Select the appropriate version for your processor:
- Intel Macs: Standard macOS download (about 1 GB)
- Apple Silicon (M1/M2): Look for “Mac with Apple chip” option
- The website typically auto-detects your system, but verify before downloading
- Installation Process
- Double-click the downloaded DMG file
- Drag Android Studio to your Applications folder
- First launch may take several minutes as it completes setup
- Initial Configuration
- During first run:
- Select “Standard” setup for recommended settings
- The installer will download:
- Latest Android SDK
- Platform tools
- Essential build tools
- Verifying Installation
- Open Terminal and run:
adb --version
After installing Android Studio, you would be prompted to drag the download file to the Applications directory.

4. Install Node JS

Now we’ll install Node.js, which includes npm (Node Package Manager) – the foundation for running React Native. Follow these steps carefully:
- Downloading the Correct Version
- Visit the official Node.js downloads page
- For React Native, we recommend:
- LTS Version (Recommended): 18.x or 20.x
- Minimum Required: 16.x
- Select the macOS installer matching your chip architecture:
- Intel Macs: “MacOS x64 Installer”
- Apple Silicon: “MacOS ARM64 Installer”
- Installation Process
- Double-click the downloaded .pkg file
- Follow the installation wizard (all default settings are fine)
- Installation typically completes in 1-2 minutes
- Verifying the Installation
Open Terminal and run these commands:
   node -v  # Should return v18.x.x or higher
   npm -v   # Should return 9.x.x or higher
npx -v # Should return 9.x.x or higher- Why Node.js Matters for React Native
- Powers the JavaScript runtime environment
- Includes npm for managing dependencies
- Provides npx for executing React Native CLI commands
- Required for Metro bundler (development server)
Multiple Node Versions
- If you need multiple Node versions, consider installing:
brew install nvm- For Apple Silicon users, Node.js runs natively on ARM architecture
- The installation automatically adds Node to your system PATH
Troubleshooting:
If commands aren’t recognized after installation:
- Restart your Terminal
- Verify Node was added to your PATH:
echo $PATH | grep node- Reinstall if necessary
5. Install React Native
Now we’ll see how to set up a React Native Android environment for MacBooks – the standard toolchain for professional React Native development. Run this command:
npx @react-native-community/cli@latest init AwesomeProjectThis will create a folder called AwesomeProject in the Documents folder.


6. Set Environment Variables and Sdk Path
Next, for our newly created React Native project to work, we have to set our Sdk path, we will do that through bash command. Open up your terminal and run the following code:
vim ~/.zshrcNext add the following lines to the terminal:
export JAVA_HOME=$(/usr/libexec/java_home)
export ANDROID_SDK_ROOT=$HOME/Library/Android/sdk
export ANDROID_HOME=$HOME/Library/Android/sdk
export PATH=$PATH:$ANDROID_SDK_ROOT/emulator
export PATH=$PATH:$ANDROID_SDK_ROOT/platform-tools
export PATH=$PATH:$ANDROID_HOME/platform-tools
export PATH=$PATH:$ANDROID_HOME/cmdline-tools\latest\bin
Next, type the following command to both save and exit the vim interface:
:wqTo verify that our environment is set, navigate to your project folder and run the following command:
npx react-native doctor
You can see our Node JS and Android environment is set.
7. Open up Your Android Folder in the Android Studio
Next, we will open up our Android folder only in Android Studio. React Native generates two folders: android and iOS folders. We’re concerned with the android folder, and that is what we want to open up. Go to Android Studio and click Open, narrow down to the android folder in your project and click Open:

8. Run Your React Native Project
Next, we will run our React Native project. We will open up the terminal and narrow down to our AwesomeProject folder and run the following command:
npx react-native run-android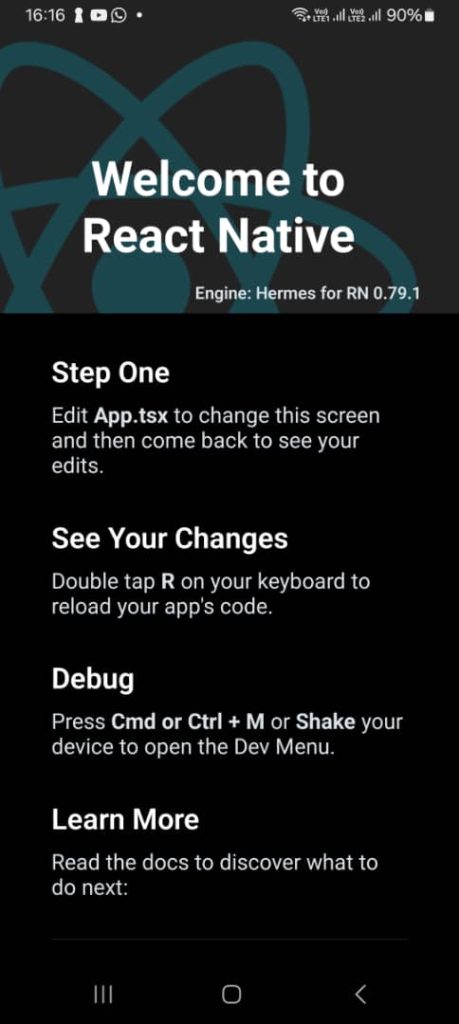
You’re all set! This is how to set up a React Native Android environment on MacBooks.

- Common PHP Security Vulnerabilities and How to Fix Them - May 8, 2025
- How to Set Up a React Native Android Environment on MacBooks - April 26, 2025
About the Author
Discover more from TruthPost
Subscribe to get the latest posts sent to your email.